Table of Contents
- Fix Your HTTPS and Security Basics First
- Get Your XML Sitemap and Robots.txt Right
- Canonical Tags and Duplicate Content
- Core Web Vitals and Performance Fundamentals
- Structured Data and Rich Snippets
- Handle Indexation and Crawl Directives
- Audit Redirects, 404s, and Broken Links
- Final Check: Test Mobile Usability and Page Experience
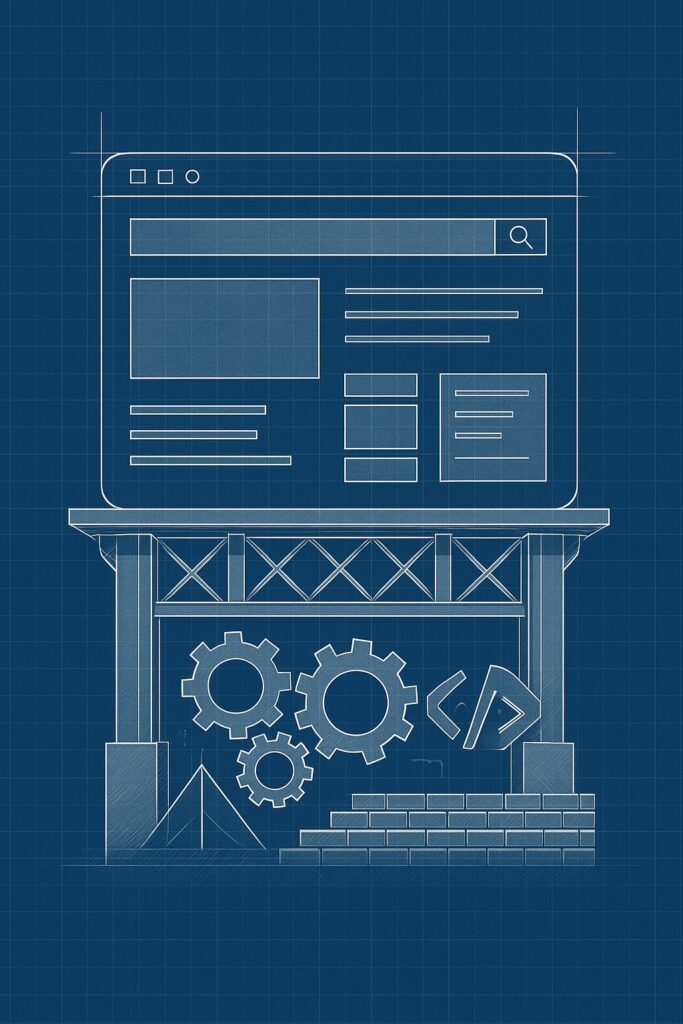
You can write the best article in your niche, nail the keyword research, and craft perfect meta descriptions. But if Google’s crawlers hit redirect chains, can’t parse your structured data, or waste time on pagination loops, you’re fighting uphill.
This isn’t about perfection. It’s about eliminating the silent killers that prevent your content from ranking — the technical issues that most WordPress users don’t even know exist.
Here’s what actually moves the needle before you click publish.
Fix Your HTTPS and Security Basics First
Google made HTTPS a ranking factor back in 2014. Yet half the WordPress sites I audit still serve mixed content warnings or have incomplete SSL implementations.
The three-minute HTTPS audit:
Load your homepage and check the address bar. If you see a padlock icon with no warnings, you’re clear. If you see Not Secure or a triangle warning, you have mixed content — some resources loading over HTTP instead of HTTPS.
Open your browser’s developer console. Look for any HTTP requests. Common culprits: embedded videos, old images hotlinked from other sites, fonts from legacy CDNs.
Fix it in WordPress: Install Really Simple SSL or use a search-replace plugin to update all internal URLs from http:// to https://. Then set up a 301 redirect from HTTP to HTTPS in your .htaccess file or via your host’s control panel.
Security headers matter too. Set X-Content-Type-Options, X-Frame-Options, and Content-Security-Policy headers through your caching plugin or a security plugin like Wordfence. These won’t dramatically boost rankings, but they signal to Google that your site is trustworthy.
Force HTTPS at the Server Level
Don’t rely on WordPress to handle redirects. Configure HTTPS enforcement at the server or CDN level. Cloudflare users can enable automatic HTTPS rewrites. Apache users add the redirect rule directly in .htaccess.
This eliminates an extra PHP call on every page load.
Get Your XML Sitemap and Robots.txt Right
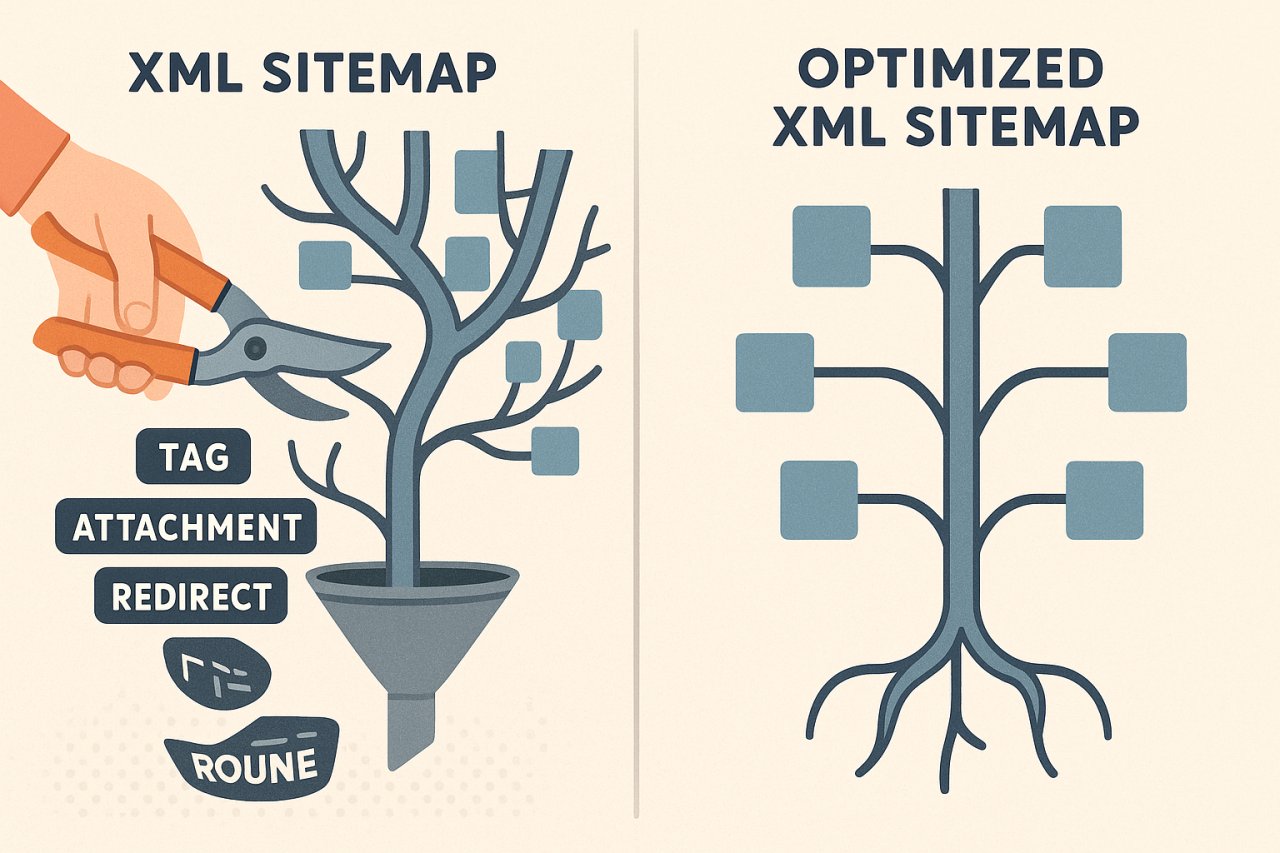
Your XML sitemap tells Google what to crawl. Your robots.txt tells it what to skip. Most WordPress sites get both wrong.
XML sitemap essentials:
Use Yoast SEO or RankMath to generate your sitemap automatically. Then audit it manually. Open yoursite.com/sitemap_index.xml and check for bloat.
Remove these from your sitemap:
– Tag and author archives (unless you actively optimize them)
– Attachment pages (the standalone pages WordPress creates for media files)
– Paginated pages beyond page 1
– Any URL that returns a 301 redirect
Your sitemap should only include indexable, canonical URLs that deliver unique value. If a page is thin, duplicate, or redirects elsewhere, it doesn’t belong.
The Robots.txt Mistake Everyone Makes
Default WordPress robots.txt files block wp-admin but leave wp-content and wp-includes open. That’s mostly fine. The mistake is blocking CSS and JavaScript files.
Google needs to render your pages to understand content and measure Core Web Vitals. If you disallow /wp-content/themes/ or /wp-includes/, you’re shooting yourself in the foot.
Keep it minimal. Block wp-admin, block search result pages (?s=), and block WordPress login pages. Leave everything else crawlable unless you have a specific reason to block it.
Canonical Tags and Duplicate Content
WordPress creates duplicate content by default. Every post lives at multiple URLs: the post permalink, category archives, tag archives, author archives, date archives.
Canonical tags tell Google which version is the real one.
Most SEO plugins handle this automatically. But you need to audit it, especially if you’ve switched themes, changed permalink structures, or migrated from another CMS.
Check these canonical scenarios:
- Homepage: Should point to yoursite.com/, not yoursite.com/page/1/
- Post pages: Should point to the post permalink, not archive URLs
- Pagination: Page 2+ should self-canonicalize or use rel=prev/next
- AMP and mobile versions: Should canonical to the desktop URL
Open any paginated archive on your site. View source and find the canonical tag. If it points to page 1 instead of the current page number, you’re consolidating signals away from deep pagination — which is usually good. But if you want those pages indexed separately, each should self-canonicalize.
WordPress pagination is messy. Most sites are better off using a load more button or infinite scroll to avoid pagination issues entirely.
Canonical Conflicts With Plugins
If you run multiple SEO plugins or a page builder with its own SEO module, you can end up with conflicting canonical tags. Google will honor the HTTP header canonical over the HTML tag canonical, and the HTML tag in the head over one in the body.
Pick one source of truth. Disable canonical output from all other plugins.
Core Web Vitals and Performance Fundamentals
Google uses Core Web Vitals as a ranking factor. Three metrics matter: Largest Contentful Paint (LCP), First Input Delay (FID), and Cumulative Layout Shift (CLS).
Most WordPress performance advice focuses on caching and image optimization. That helps. But CWV failures usually come from three sources: render-blocking JavaScript, unoptimized images above the fold, and layout shift from ads or embeds.
Fix LCP by Prioritizing Above-the-Fold Content
LCP measures how fast your largest visible element loads. Usually your hero image or your H1 text block.
Preload critical resources. If your hero image is essential, add a preload tag in your theme’s header. If you’re using a web font for headings, preload the font file.
Defer non-essential JavaScript. Every script that runs before your content renders slows LCP. Use async or defer attributes. Or better: eliminate unnecessary scripts entirely.
Eliminate CLS by Reserving Space for Dynamic Content
CLS measures visual stability. If elements shift while the page loads, CLS spikes and users get frustrated.
Set explicit width and height attributes on all images. Modern WordPress adds these automatically in Gutenberg, but older posts might be missing them. Use lazy loading for images below the fold, but avoid lazy loading your LCP image.
Ads, embeds, and pop-ups are CLS killers. Reserve space for them in your layout with min-height CSS rules.
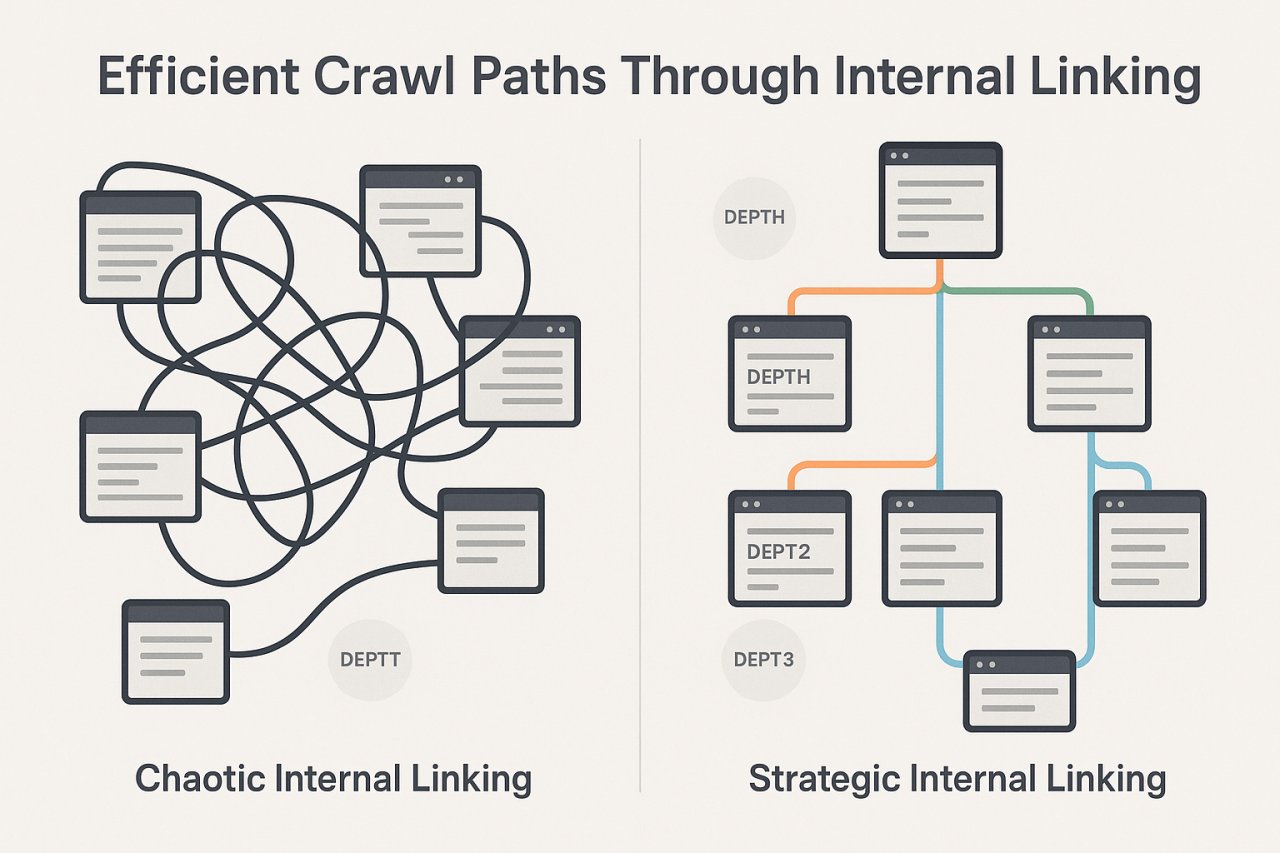
The Internal Linking Angle
Here’s the connection most people miss: site structure affects crawl efficiency, which affects how Google allocates your crawl budget.
If your internal linking is chaotic — deep pages buried five clicks from the homepage, orphan posts with no incoming links, menus bloated with 50+ items — Google wastes time crawling low-value pages and misses your best content.
A clean information architecture with strategic internal links helps Google find and index important pages faster. Tools like AI Internal Links can automate this by analyzing your content and inserting contextually relevant links at scale, ensuring no page gets orphaned and crawl paths stay efficient.
Structured Data and Rich Snippets
Structured data won’t directly boost rankings. But it unlocks rich snippets — star ratings, FAQ accordions, breadcrumbs, recipe cards — that increase click-through rates.
WordPress SEO plugins add basic structured data automatically. Yoast outputs Organization and WebSite schema. RankMath adds Article schema to posts.
But if you publish specific content types — recipes, products, events, how-tos — you need additional schema markup.
Test your structured data: Use Google’s Rich Results Test (search.google.com/test/rich-results) on every template type. Check your homepage, a blog post, a category archive, and any custom post types.
Common errors: Missing required fields, incorrect date formats, broken image URLs in schema markup.
If you run an eCommerce site, Product schema with price and availability is non-negotiable. If you publish recipes, Recipe schema with ingredients and cook time unlocks the recipe carousel. If you write how-to guides, HowTo schema gets you step-by-step rich results.
Breadcrumbs Schema Improves Site Architecture Signals
Breadcrumbs schema shows Google your site hierarchy. It also appears in search results as a breadcrumb trail instead of a plain URL.
Enable breadcrumbs in your theme or plugin. Then validate the BreadcrumbList schema in your source code. Each level should link correctly: Home > Category > Post.
Handle Indexation and Crawl Directives
Not every page on your WordPress site should be indexed. Tag archives, author archives, search results, login pages — these dilute your site’s focus and waste crawl budget.
Pages to noindex by default:
- Tag archives (unless you write custom intros and optimize them)
- Author archives on single-author sites
- Attachment pages (the standalone media file pages)
- Search result pages
- Paginated pages beyond page 1 (or use canonical consolidation)
In Yoast or RankMath, set these to noindex globally. Then audit for edge cases. If you have one high-traffic tag archive that drives conversions, index that one manually.
A lean index beats a bloated one. Google doesn’t reward you for having 10,000 pages — it rewards you for having 1,000 pages that each serve a purpose.
Use Google Search Console to monitor indexed pages. If you see a spike in indexed URLs that doesn’t match your publishing schedule, you probably have an indexation leak — WordPress is exposing pages you meant to keep out of search results.
Crawl Budget Optimization for Large Sites
If you publish fewer than 1,000 pages, crawl budget isn’t your bottleneck. But if you run a content-heavy site or eCommerce store, every wasted crawl is an opportunity cost.
Reduce crawl waste by fixing 404s, consolidating thin pages, and blocking low-value URL parameters in Search Console. Then use internal linking to guide Googlebot toward your most important pages. Pages linked from your homepage or main navigation get crawled more frequently than deep orphan posts.
Audit Redirects, 404s, and Broken Links
Redirect chains slow down crawlers and users. A 301 redirect already costs time. A chain of three redirects — example.com/old → example.com/temp → example.com/new — triples the delay.
Use Screaming Frog or a WordPress plugin like Broken Link Checker to find redirect chains and broken internal links. Fix them by updating the link directly to the final destination.
404 errors aren’t a ranking penalty, but they create a terrible user experience. More importantly, if you have broken internal links pointing to 404s, you’re wasting link equity.
Monitor 404s in Google Search Console. If a deleted page still gets traffic or external backlinks, set up a 301 redirect to a relevant replacement.
The Redirect Plugin Trap
Redirection plugins like Redirection or Simple 301 Redirects work, but they run on every page load. For high-traffic sites, this adds database queries and slows response time.
If you have more than 50 redirects, move them to your .htaccess file or handle them at the server level through Cloudflare or your CDN. This eliminates the PHP overhead.
Final Check: Test Mobile Usability and Page Experience
Google indexes mobile-first. If your mobile version is broken, your rankings suffer even if desktop looks perfect.
Open Google Search Console and check Mobile Usability reports. Common issues: text too small to read, clickable elements too close together, viewport not set, content wider than screen.
Most modern WordPress themes are mobile-responsive. But custom CSS, third-party plugins, and embedded content can break responsiveness. Test your site on real devices, not just desktop browser resizing.
Page Experience signals matter: HTTPS, mobile-friendly design, no intrusive interstitials, and safe browsing status. These won’t make up for bad content, but they’re table stakes.
Before you publish your next post, run through this checklist one more time. You’ll catch issues that would’ve cost you rankings, traffic, and credibility.